How to Set Up AWS Cloud9 Environment
Cloud9 is a web-based IDE that runs on an AWS EC2 instance. This means we do not need to install any IDE on our local machine to be able to develop on AWS.
Create Cloud9 Environment
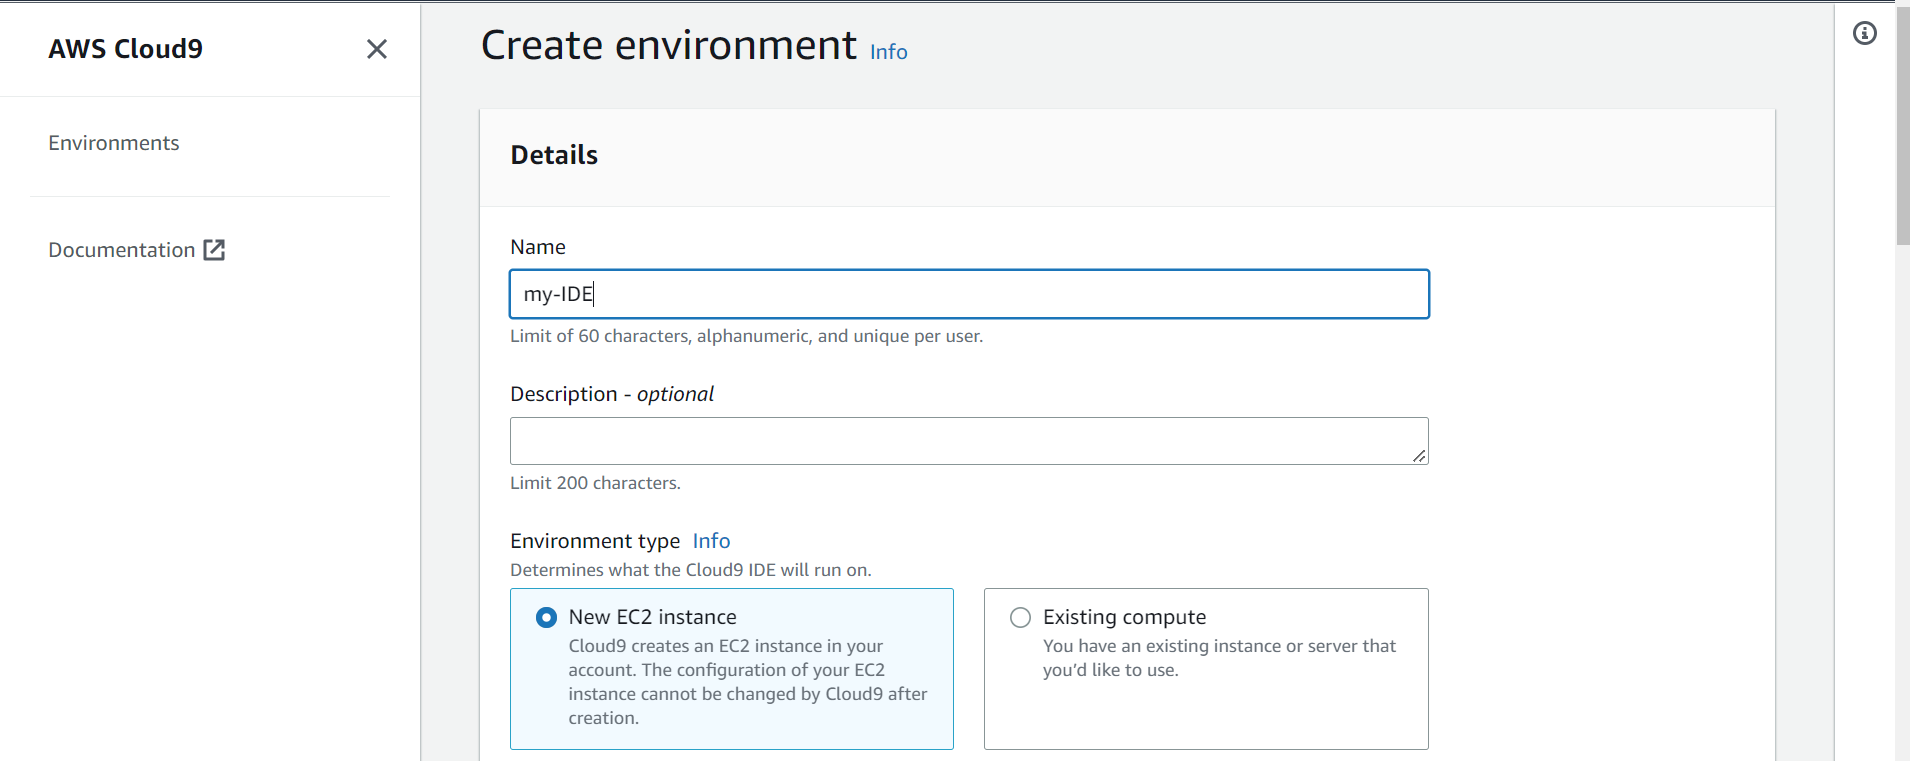
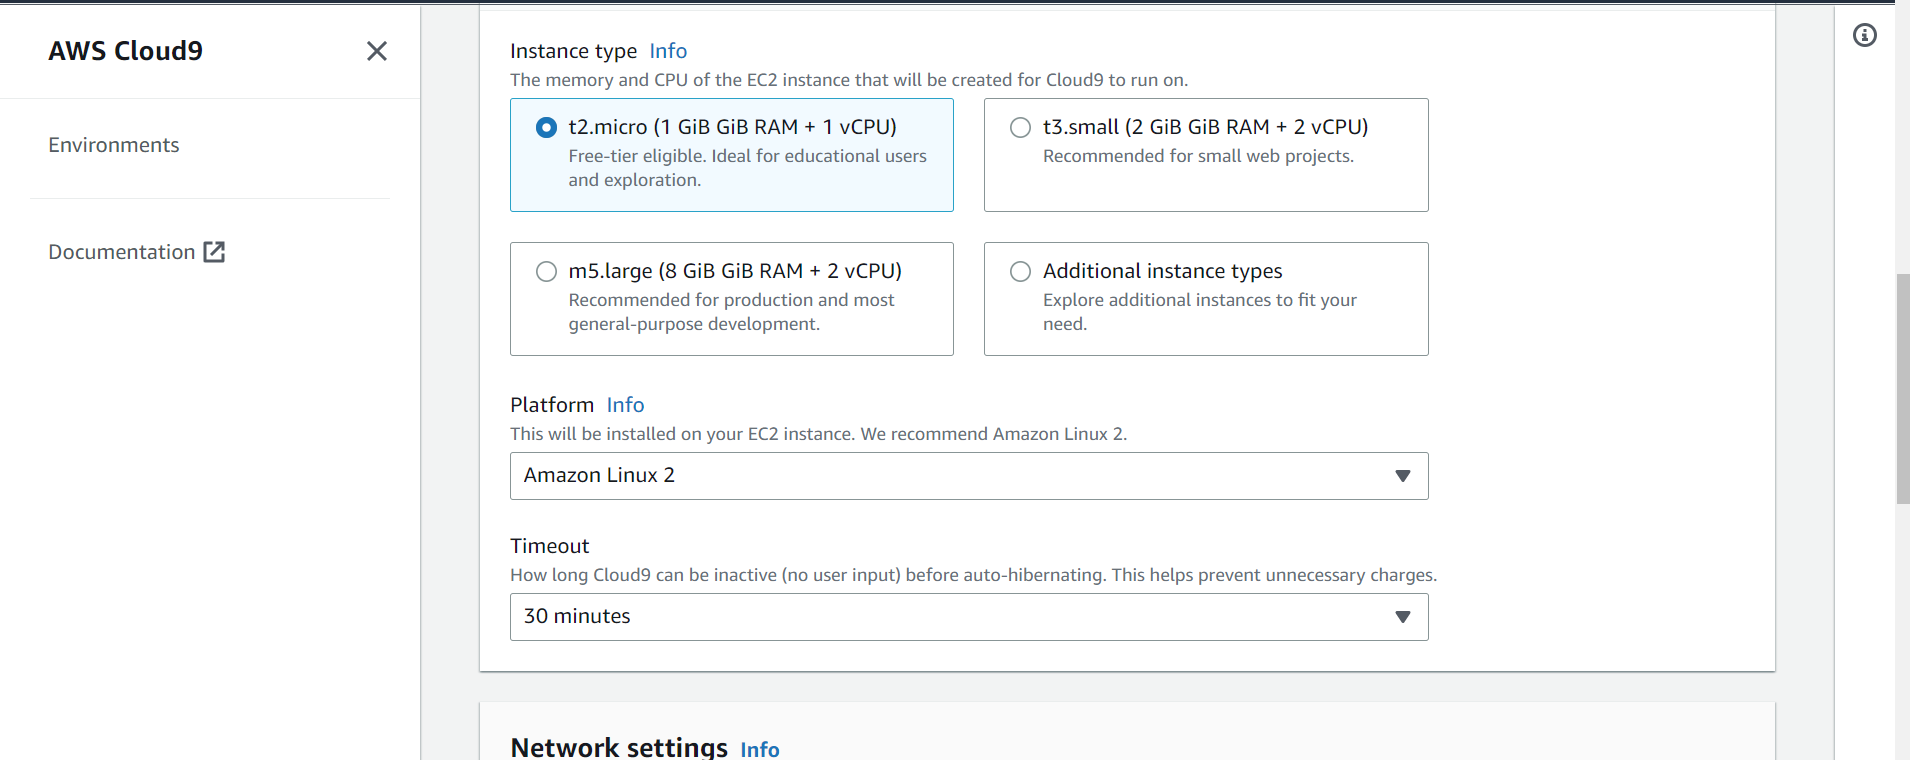
Navigate to the AWS console to create the environment. Click on Create environment. Fill in the detail which includes selecting the instance type.
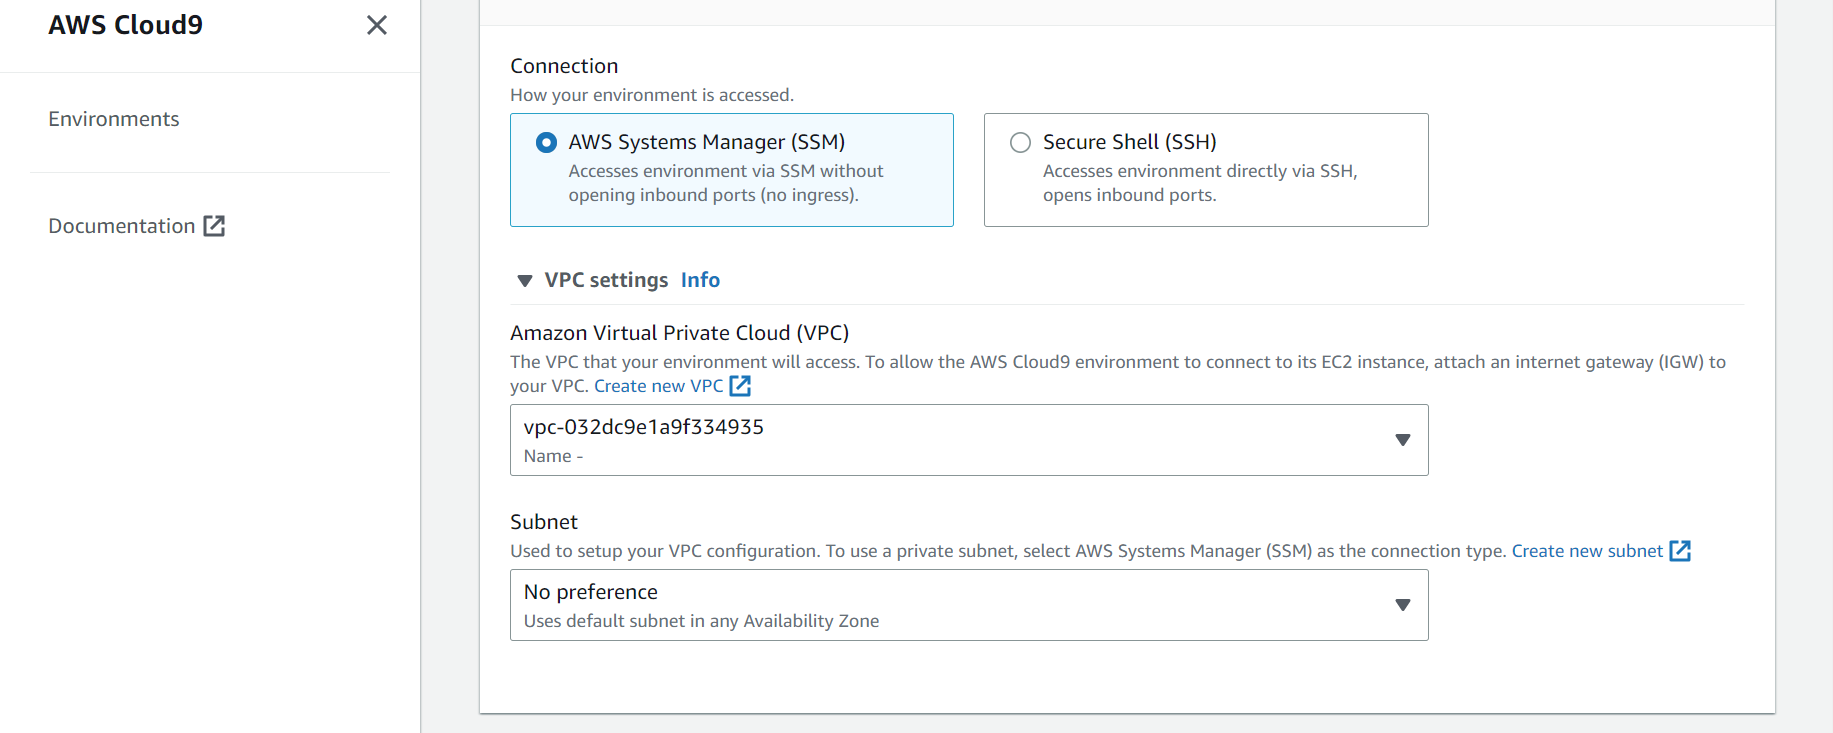
Choose the default VPC under VPC settings
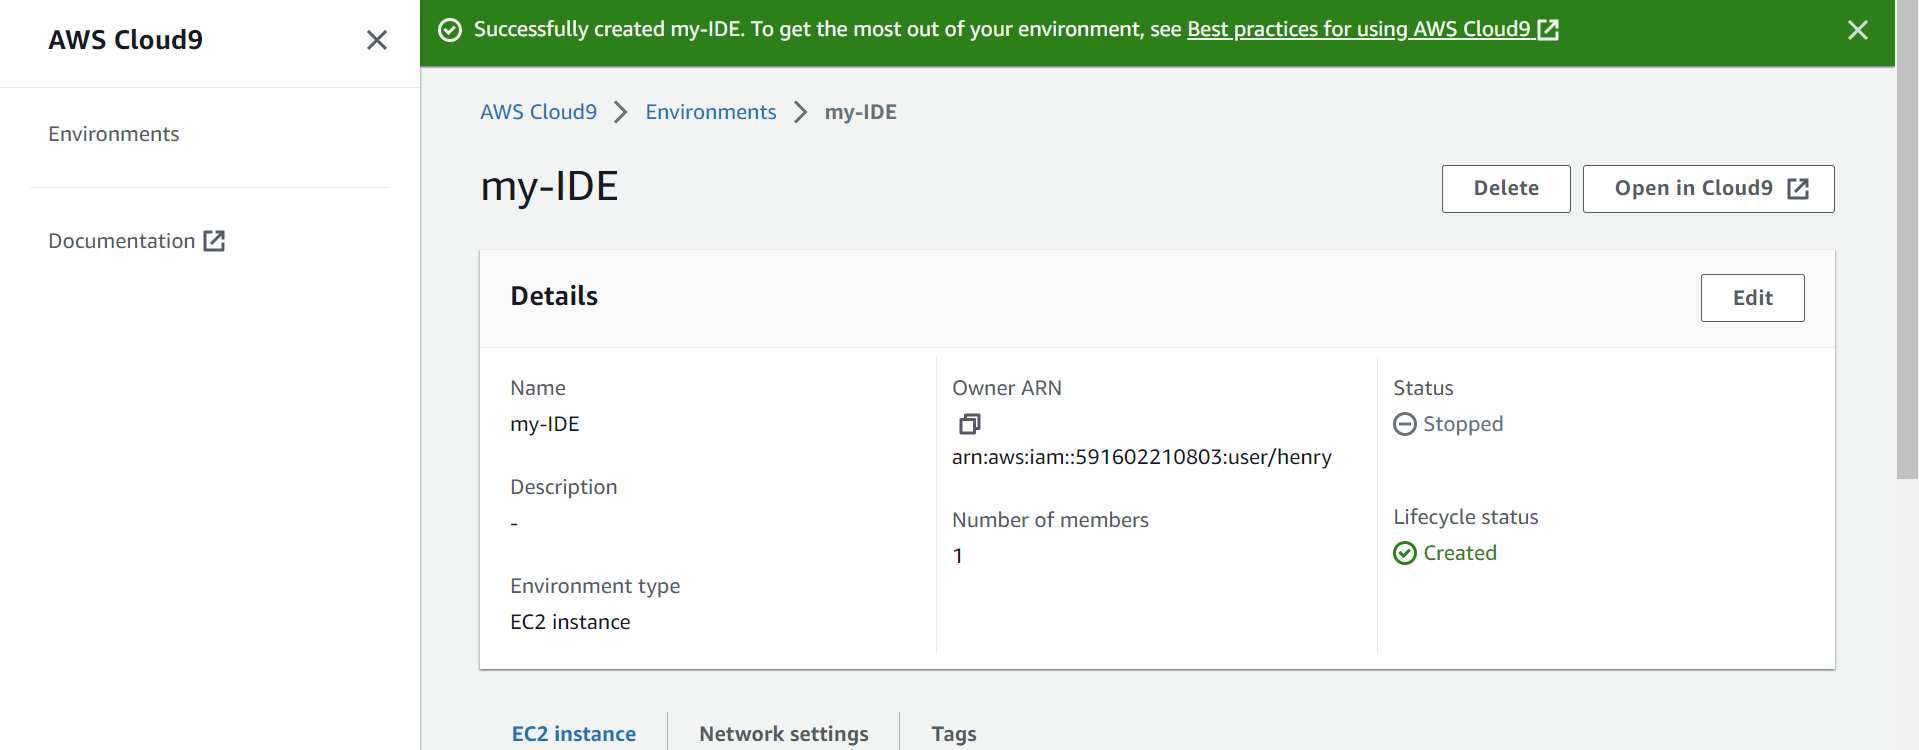
Then click on Create. After the creation of cloud9, click on the name of the created cloud9 environment

Click on Open in Cloud9
The Cloud9 IDE opens in another tab on your browser

Create An IAM Role for EC2
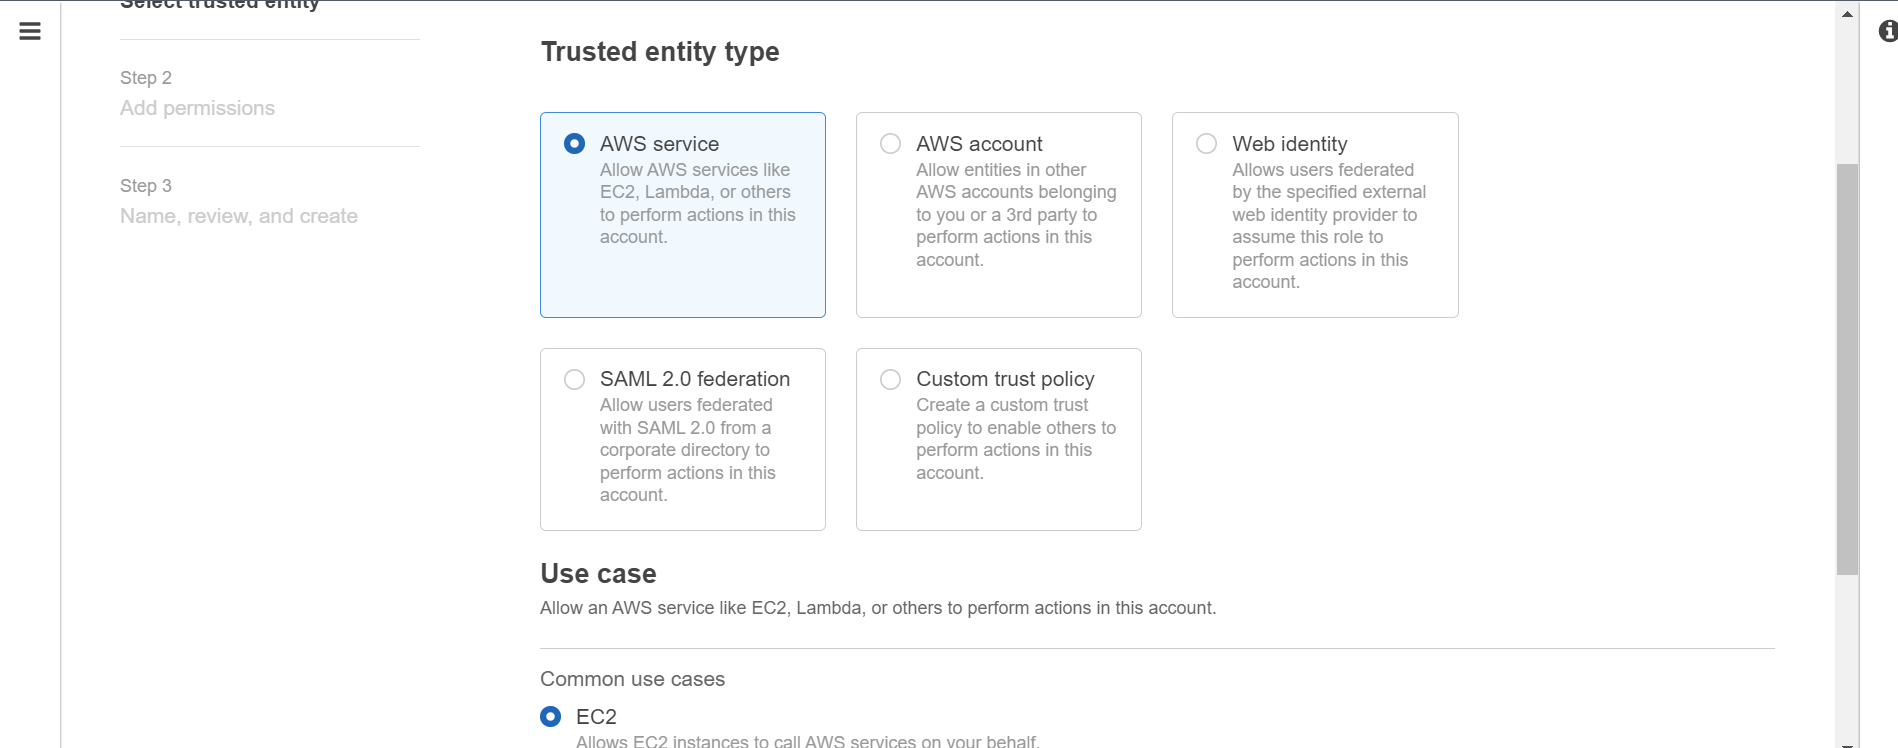
We will then create an IAM role the EC2 instance which Cloud9 runs on will assume. This role will allow the EC2 instance to make API calls to other AWS services. Navigate to Identity and Access Management (IAM), under Acess Management, click Roles and then click Create role. Under the Trust entity type, select AWS services because the EC2 instance is an AWS service that will assume the role that is being created. Under the use case, select EC2.
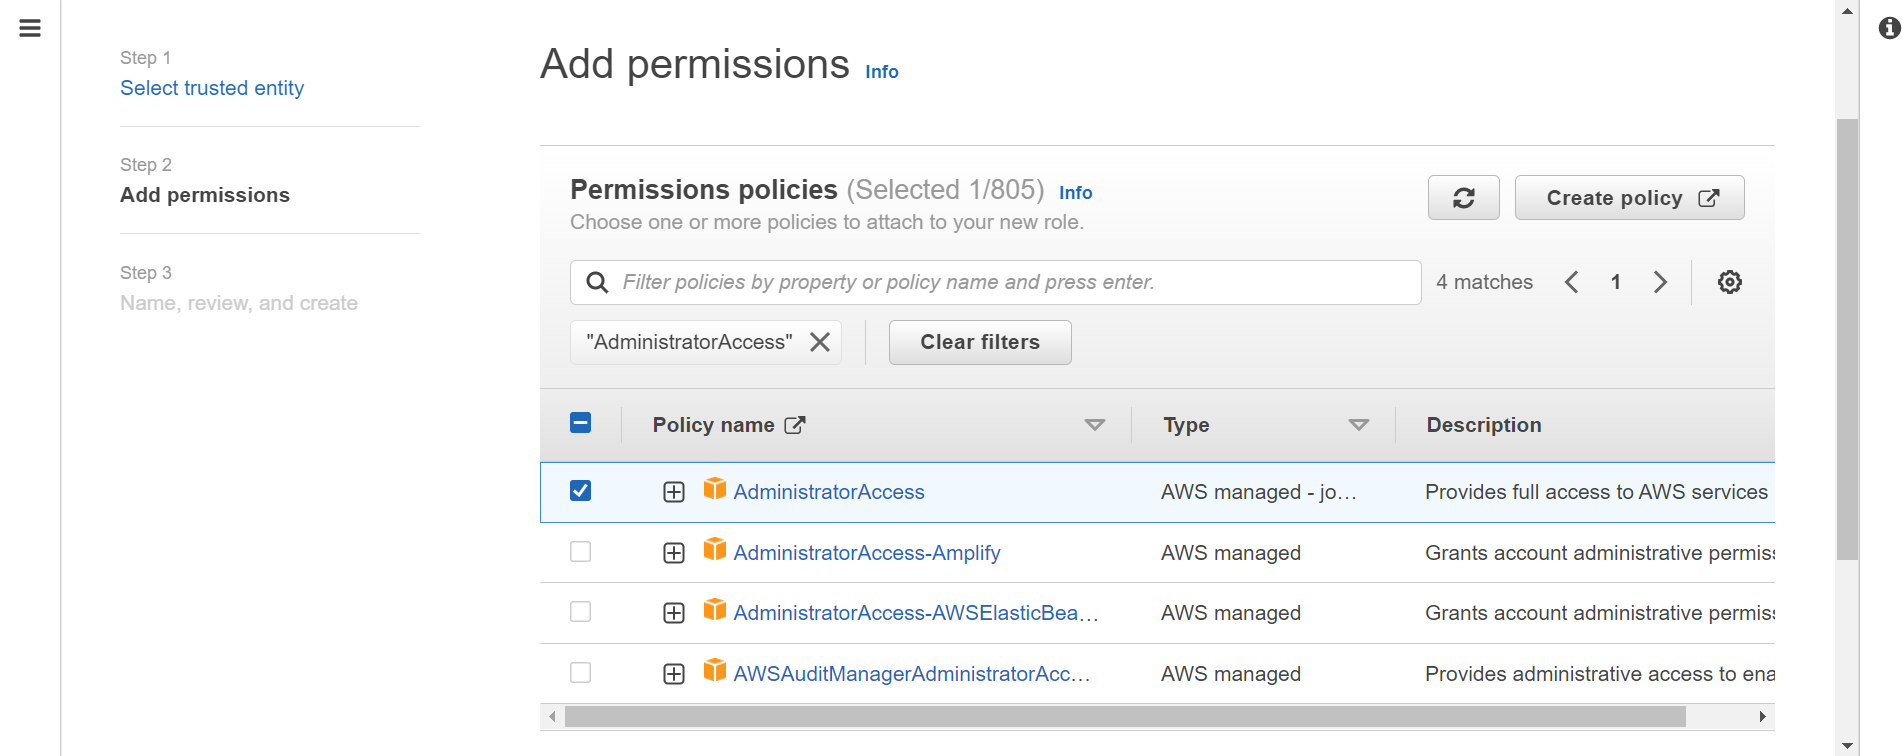
Click next. To attach a policy to the role, search for and select AdministratorAccess from permissions policies and click next.
Click next, name the role and create the role.

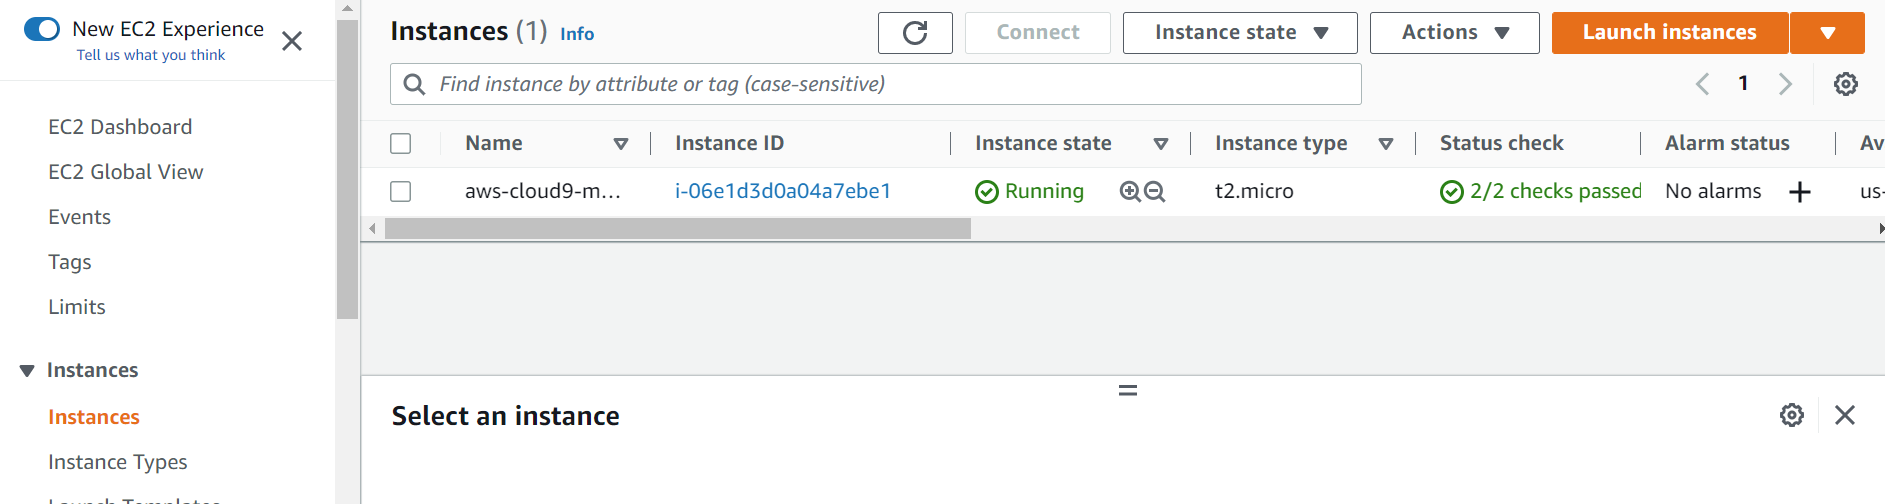
Navigate to EC2 console, and click on instances to see the EC2 instance created on which cloud9 runs on.
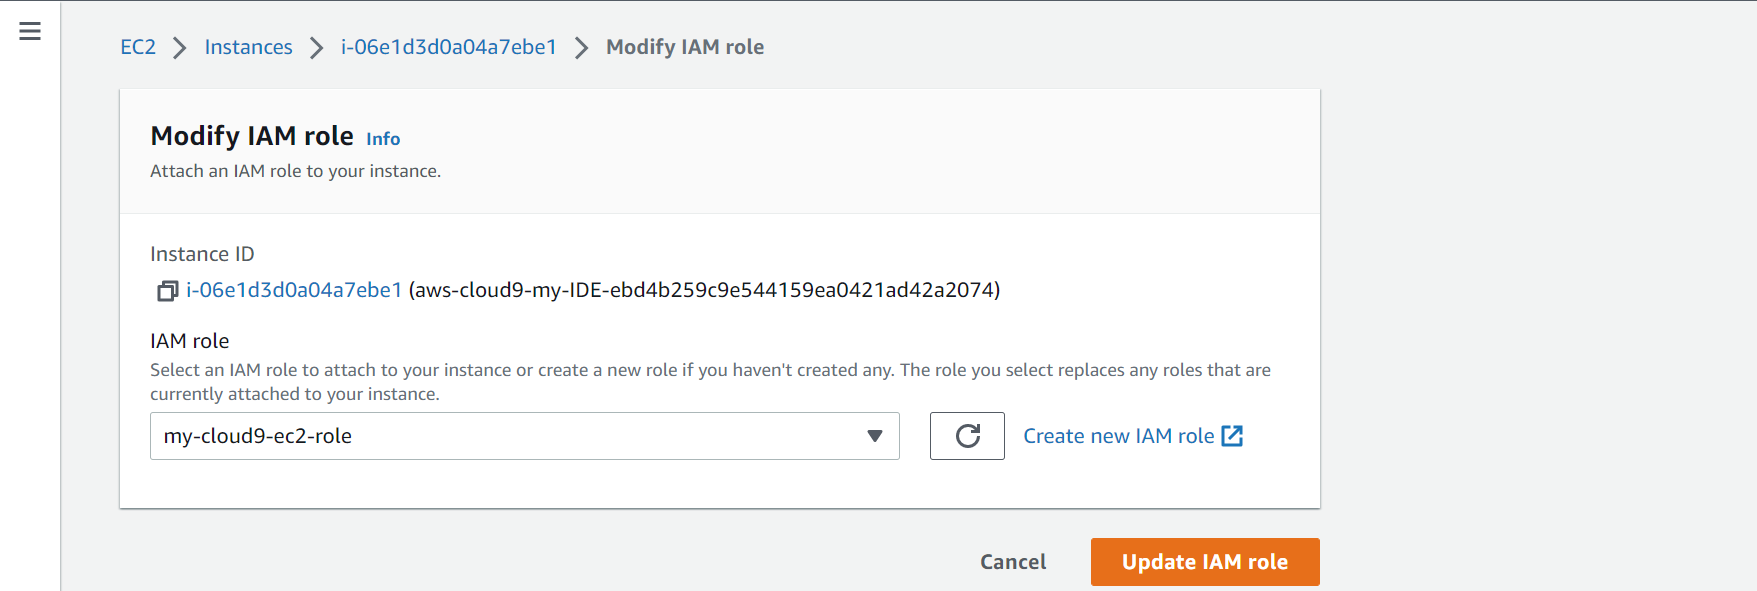
Select the EC2 instance, click the Actions dropdown menu, select Security and then select Modify IAM role. From the menu, select the role we created earlier and that click Update IAM role.
Remove The Temporary IAM Credentials for AWS Cloud9
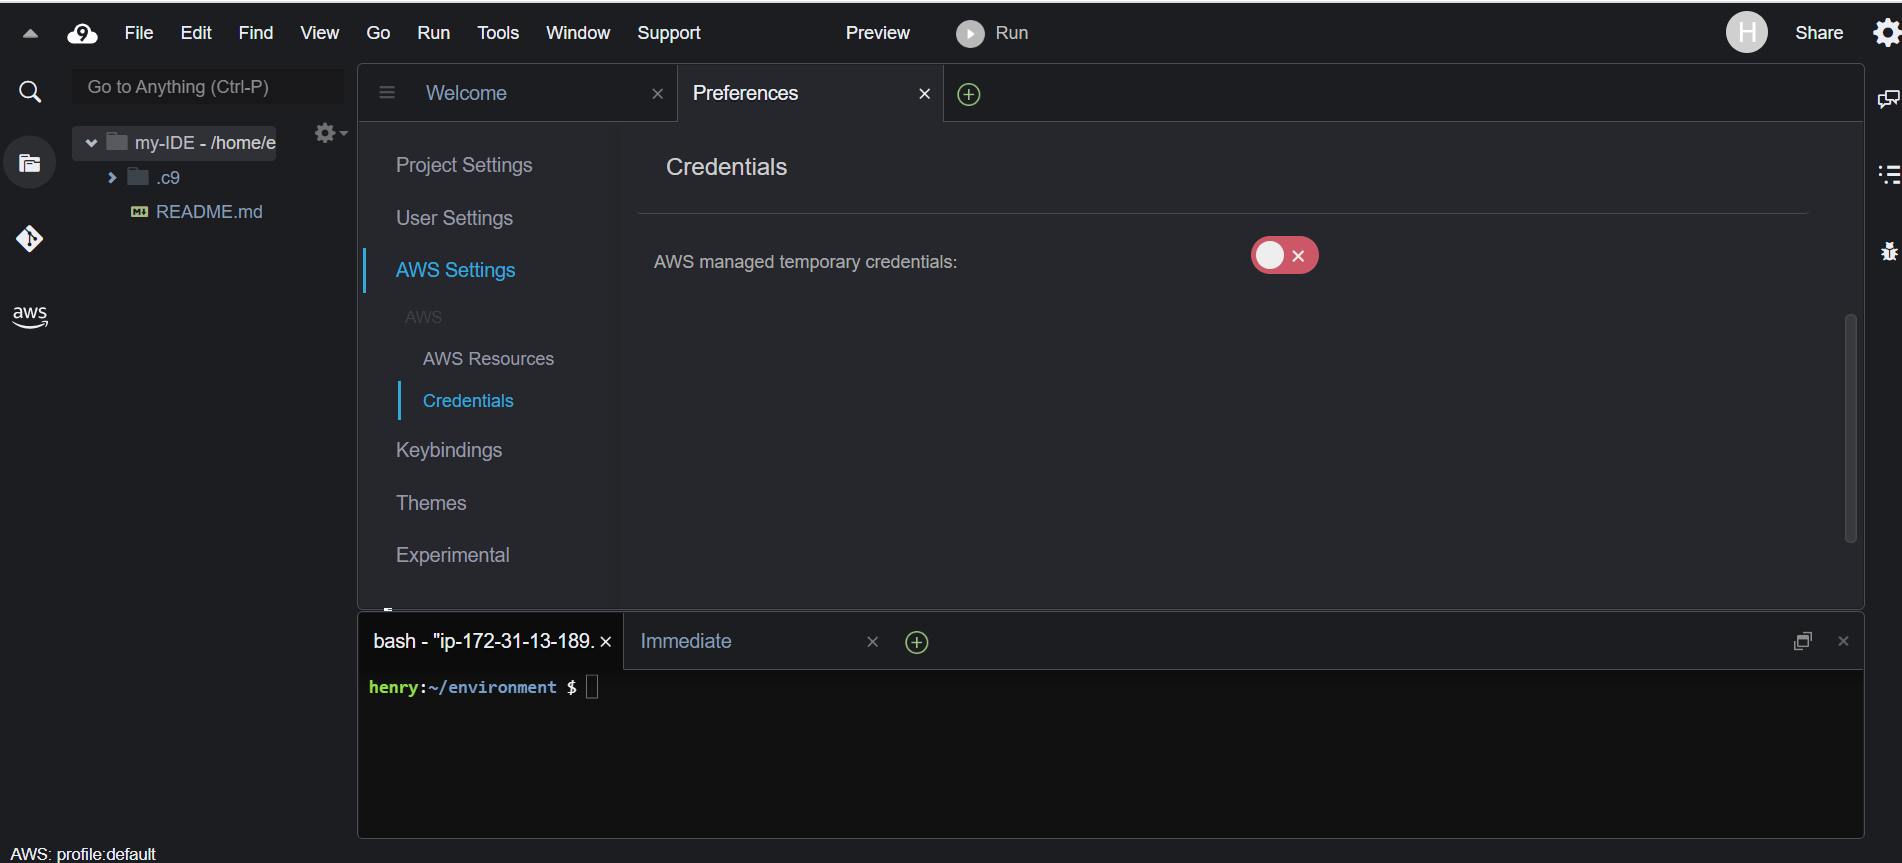
Go to AWS Cloud9 IDE, and choose Settings in the gear icon on the top right corner. Under Preferences, choose AWS settings and then choose Credentials. Turn off AWS managed temporary credentials and close the tab.